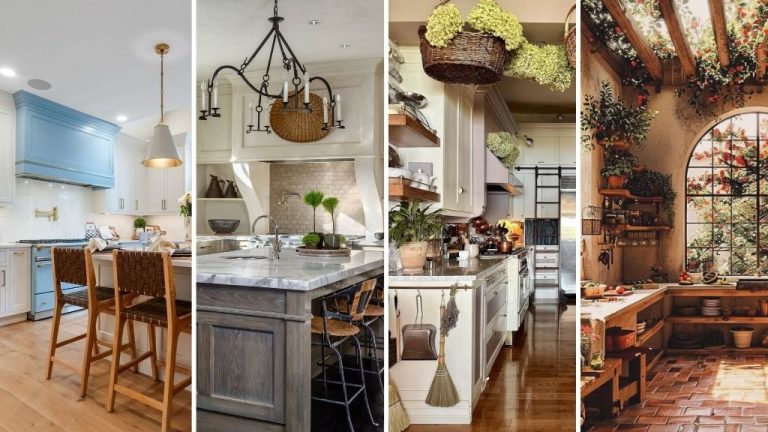
20 Simple Outdoor Kitchen Ideas to Try in 2024
Designing a simple outdoor kitchen can elevate your outdoor living experience to new heights.
With a few essential tips and clever ideas, you can transform a modest outdoor space into a functional and stylish kitchen that caters to your culinary needs.
From choosing the right location and materials to selecting versatile appliances and incorporating ample storage.
These ideas will help you create an inviting and efficient outdoor cooking area that inspires ingenuity and enhances your outdoor gatherings.
How do I start an outdoor kitchen?
To start an outdoor kitchen, begin by selecting a suitable location, considering factors like proximity to the house, wind direction, and drainage.
Plan your layout including essential components such as a grill, sink, refrigerator, and storage. Invest in durable, weather-resistant materials like stainless steel and stone.

Finally, ensure you have necessary utilities such as electricity and water supply, and consider permits if required.
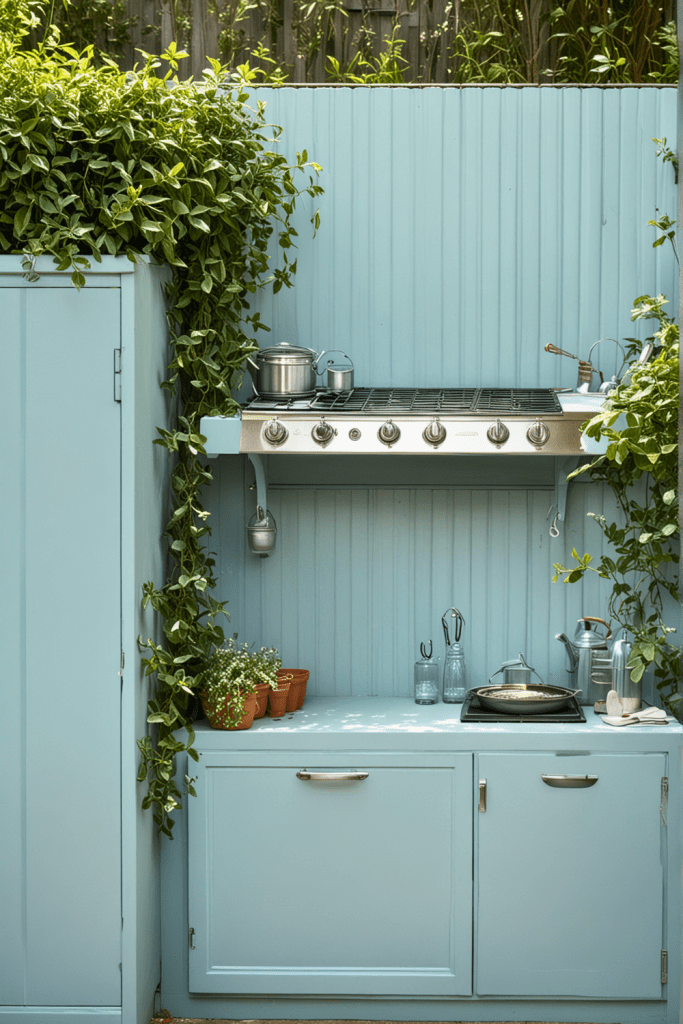
1. Basic Grill Station
Setting up a basic grill station is a fantastic idea for anyone who loves to cook outdoors. First, choose a high-quality grill that matches your needs, whether it’s charcoal, gas, or electric.
The right grill will become the centerpiece of your outdoor kitchen, so invest in one that’s durable and easy to use.
Then, provide some counter space next to the grill this is crucial for meal prep. It doesn’t have to be fancy; a simple, sturdy table will do the trick.
Having this dedicated space ensures you can marinate meats, chop vegetables, and assemble your meals conveniently.
This no-fuss setup is perfect for those who want an efficient, focused cooking area that delivers great results without over-complicating things.
So, with just a grill and some counter space, you can create an outdoor cooking haven that’s both practical and enjoyable.

2. Pallet Kitchen
Using wooden pallets to build the base for your counters and storage in an outdoor kitchen is a fantastic idea for several reasons.
It’s a budget-friendly option; pallets are often available at little to no cost. It’s an eco-conscious choice, repurposing wood that might otherwise go to waste.
The rustic aesthetic they provide adds charm and character, making your outdoor space warm and inviting.
To start, collect your pallets, ensuring they are in good condition and free of any harmful chemicals.
Measure the area where you want your counters and storage, then cut the pallets to fit these dimensions. Sand down any rough edges to prevent splinters.
Secure the pallets together with nails or screws to form a sturdy base. Finally, customize with a stain or paint that complements the rest of your outdoor décor.
This approach combines practicality with creativity, making the project both rewarding and functional.

3. Portable Bar Cart
Choosing a portable bar cart for your home is a smart move that combines practicality with style.
It serves as an excellent storage solution for your drinks and cocktail-making essentials, keeping everything within easy reach.
This is particularly useful if you enjoy hosting gatherings or parties, as it allows you to streamline your preparations.
The mobility factor is a game-changer. You can position the cart where it is most needed, whether it’s next to your pool for a summer party or in your living room during a cozy family gathering. This versatility makes it ideal for both small spaces and larger areas.
To achieve this stock it with your favorite spirits, mixers, and glassware. Add some garnishes and tools like a cocktail shaker.
To enhance its functionality, use trays to keep smaller items organized. Now, you’re ready to impress your guests effortlessly!

4. Concrete Countertops
Looking for a way to elevate your outdoor kitchen or patio? Concrete countertops offer a solution that’s both stylish and practical.
Simply put, these countertops are tough as nails. They’re resistant to scratches, and stains, and can hold up to the harshest weather conditions without breaking a sweat.
They bring a modern, polished look that can make any space look sophisticated.
It’s simpler than you might think. First, consult with a professional to discuss your design ideas and measurements.
They’ll create custom molds to suit your taste. Theb, the concrete is mixed and poured into these molds.
Once it sets, the countertop is cured to ensure strength and durability. Finally, it’s sealed to protect against any moisture or stains.
The result is a seamless, durable, and sleek surface that’s ready to withstand the elements while looking fantastic.

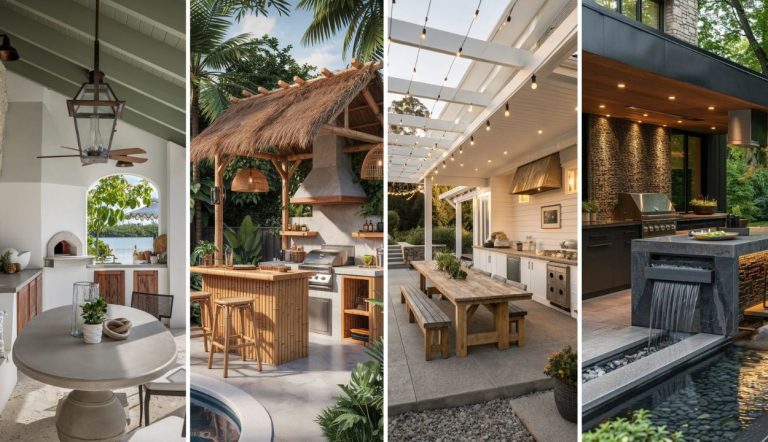
5. Covered Pergola
Adding a covered pergola to your outdoor cooking area is like giving your backyard an instant upgrade.
Not only does it provide much-needed shade during those sunny days, but it also offers a stylish element that immediately enhances the look of your space.
Being able to cook and dine outside without worrying about sudden rain showers or the blazing sun. That’s the beauty of a well-installed pergola.
To do this start by selecting a durable material that matches your outdoor decor. Measure your cooking area to ensure the pergola will fit comfortably.
Secure the posts firmly into the ground and ensure they are level. Attach the beams and rafters, and finally, add a waterproof canopy or shade cloth.
With these simple steps, you turn your outdoor kitchen into an all-weather oasis, perfect for entertaining guests or enjoying a quiet meal with family.

6. Pizza Oven Corner
Setting up a small pizza oven in your garden is a brilliant idea for those who love authentic, wood-fired pizza.
It’s not just about making pizza; it’s about creating an experience. With a wood-fired pizza oven, you get that crispy crust, perfectly melted cheese, and a hint of smokiness that a regular oven just can’t deliver.
It’s a great way to impress your friends and family with your homemade gourmet pizzas.
Start by choosing a good spot in your garden. Make sure it’s a flat, stable surface and not too close to anything flammable.
You’ll need a pizza oven kit, some firewood, and a bit of patience. Assemble the oven according to the instructions, light up your first fire to cure the oven, and you’re all set.
Once it’s ready, you can start experimenting with different toppings and dough recipes. Happy pizza making!

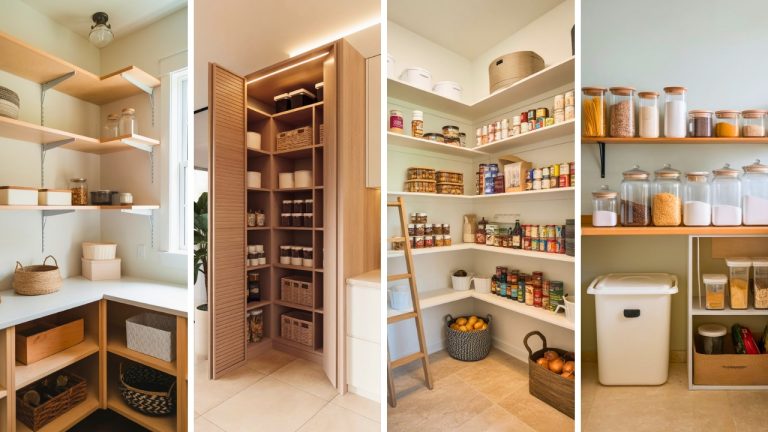
7. Repurposed Cabinetry
Repurposing cabinets for your outdoor kitchen storage is a clever and cost-effective solution.
This idea stands out because it not only saves money but also adds a unique charm to your space.
Reusing weather-resistant cabinets ensures they can withstand the outdoors, keeping your cooking supplies dry and secure.
Start by sourcing old kitchen cabinets. Look for sturdy, weather-resistant materials like stainless steel or treated wood.
If the cabinets are made of wood, consider applying a weatherproof sealant. Next, clean and refurbish the cabinets to ensure they are in good condition.
Install them securely in your chosen outdoor kitchen area, making sure they are level and firmly attached to prevent any accidents.
Customize the cabinets with weatherproof paint or finishes to match your outdoor décor.
This simple yet ingenious method not only repurposes old materials but also adds functionality and style to your outdoor space.
8. DIY Island
Building a DIY kitchen island with a built-in grill and prep area is a game-changer for any cooking enthusiast.
This project is not just about creating a functional space but also about transforming your kitchen into a hub of activity.
Having all your ingredients, utensils, and a grilling station all within arm’s reach. It’s efficient, and it makes cooking more enjoyable.
To start, measure the space where you want the island. Plan your design to include a sturdy countertop for prepping, storage shelves, and a designated area for the grill.
Choose materials that are durable and easy to clean, like stainless steel or butcher block. Assemble the frame, secure the countertop, and install the grill.
Finish with a backsplash to protect your walls and add a touch of style. This DIY island is straightforward to build and immensely rewarding.

9. Garden Backdrop
Positioning your outdoor kitchen near your garden is a brilliant idea that offers both practical and aesthetic benefits.
This setup ensures your meals are not only fresher but also bursting with flavor. Having a verdant garden as a backdrop creates a serene and picturesque cooking space that can significantly enhance your overall culinary experience.
To achieve this, decide the best spot for your kitchen by considering proximity to your garden and ease of access.
Ensure there’s enough space for both cooking and gardening activities without one encroaching on the other.
Plant a diverse range of herbs and vegetables that thrive in your climate to get the most out of your garden.
Regularly tend to the plants, ensuring they are well-watered and free from pests. This thoughtful arrangement will make your cooking fresher and your garden more useful and beautiful.

10. Drop-In Cooler
Implementing a drop-in cooler is a smart alternative to installing an entire refrigerator for your outdoor needs.
This idea is not only light on your wallet but also helps save on energy. Hosting a summer BBQ or camping trip; you want cold drinks and fresh food but don’t want the hassle or cost of setting up a full fridge outside.
That’s where a drop-in cooler comes in handy. You can easily place it in your outdoor kitchen or even in a simple wooden counter with a lid.
The cooler keeps your items chilled using less power and is easy to access. Just open the lid, and your refreshing beverages and perishables are right there, ready to enjoy.
This method is both practical and efficient, making your outdoor gatherings and adventures more enjoyable without the overheads of traditional refrigeration.

11. String Lights
String lights are a fantastic way to make your outdoor kitchen more welcoming and stylish. They create a cozy glow that can transform any evening into a charming, intimate experience.
This idea is perfect for homeowners who love hosting gatherings and want to enhance their outdoor space without spending a lot of money.
String lights are versatile and can be easily adjusted to fit any layout, making them a practical addition for any occasion.
To set up your string lights, first, choose the type that best suits your yard classic bulbs, fairy lights, or even solar-powered versions.
Measure the area where you want to hang them and ensure you have enough length. Secure the lights using hooks, nails, or poles, keeping them in place along the edges of your kitchen or above seating areas.
Plug them in or ensure they receive adequate sunlight if solar-powered, and enjoy your beautifully lit outdoor space.

12. Simple Smoker Setup
Adding a smoker to your outdoor kitchen can seriously enhance your culinary game. The deep, smoky flavors it brings to meats, vegetables, and even cheeses are unmatched by any other cooking method.
It’s an excellent way to elevate your weekend BBQs and provides an exciting opportunity to experiment with various smoking techniques.
With a smoker, you can infuse your dishes with different woods, like hickory or mesquite, each bringing its unique taste.
Choose a smoker that fits your space and budget options range from compact electric units to large offset smokers.
Place it in a well-ventilated area of your outdoor kitchen. Begin by selecting the type of wood you wish to use.
Preheat your smoker, add your chosen food, and control the temperature to maintain a slow, even cook. With this simple setup, you’ll be on your way to becoming an outdoor smoking pro.

13. Chalkboard Menu
Decorating with a chalkboard menu is a clever idea that adds a touch of charm and organization to your next gathering.
A chalkboard menu is both practical and stylish. It offers a visual element to showcase your dishes, immediately grabbing guests’ attention and keeping them informed. Plus, it’s a handy tool for the host to stay on top of the meal plan.
To set this up, start by purchasing a chalkboard or creating your own with chalkboard paint on a smooth surface.
Place it in a central location where it’s easily visible to guests. Use colorful chalk to write out your menu, adding any fun doodles or decorations to match your event’s theme.
Don’t worry about perfection; part of the charm lies in its handcrafted look. This simple addition can turn a regular meal into a delightful experience.

14. Recycled Wood Features
Recycled wood features are an exciting and smart way to introduce sustainability into your kitchen design.
To aechevie this use wood that has been reclaimed from older structures like barns, factories, or even homes.
Because each piece of wood carries a unique history and adds character that new materials simply can’t match.
It’s a great way to be environmentally friendly while also bringing a touch of the past into your home.
The method is simple. First, source your wood from local suppliers who specialize in reclaimed materials.
This ensures you’re getting quality pieces that are suitable for kitchen use and work with a skilled carpenter or contractor who understands how to treat and install reclaimed wood.
Finally, integrate these wooden elements into various parts of your kitchen, such as countertops, shelves, or even as a feature wall.

15. Fold-Down Countertops
Fold-down countertops are a game-changer for maximizing space, especially in small kitchens.
The brilliance of this concept lies in its ability to adapt to your needs providing ample countertop space for preparing meals, crafting, or any task requiring a flat surface, and then folding away to create more room.
Not just practical, fold-down countertops can be an attractive addition to your kitchen design, integrating smoothly while adding a modern touch.
Implementing this idea is simple. Many designs are available that can be mounted directly onto your wall.
When needed, simply release the latch or support mechanism to lower the countertop into position.
Reinforced hinges and sturdy materials ensure it can handle everyday use. Once finished, lift and secure it back into place, instantly freeing up precious space and maintaining a clutter-free environment.

16. Vertical Herb Garden
If you’re strapped for space but love fresh herbs, a vertical herb garden is a game-changer.
This idea is practical and stylish, giving you easy access to herbs like basil, mint, or rosemary right when you’re cooking.
To get started, find a sunny spot in your kitchen. Use wall-mounted planters or repurpose a shoe organizer for an affordable option.
Fill the pockets or containers with good quality potting soil and plant your favorite herbs. Water them regularly and ensure they get plenty of sunlight.
You’ll enjoy cooking with fresh, flavorful herbs that you’ve grown yourself, making every meal taste even better.
This method not only makes efficient use of limited space but also turns your kitchen into a mini garden, enhancing both your cooking and your home’s aesthetic.

17. Compact Beverage Center
Setting up a compact beverage center in your home is a fantastic way to enhance both convenience and hospitality.
This idea is all about creating a small, dedicated area with a compact fridge to store drinks and a cabinet for glasses and other bar essentials. It’s perfect for keeping guests refreshed and the chef happy.
A beverage center can transform your home’s entertaining experience by providing easy access to drinks without the need to constantly run to the main kitchen. This makes hosting more enjoyable and efficient.
Choose a spot in your kitchen, living room, or even your outdoor area. Install a compact fridge that fits the space, and add a small cabinet or shelf for glassware, mixers, and other bar tools.
Personalize it with a stylish tray, and some decorative elements, and you’ll have a functional yet charming beverage station ready to impress.

18. Mason Jar Storage
Mason jar storage is an ingenious and stylish way to keep your kitchen organized and attractive.
This simple idea turns ordinary mason jars into functional storage for spices and utensils by hanging them from the underside of your counters.
It’s incredibly practical; you free up valuable counter and cabinet space while keeping essentials within arm’s reach. It’s also a delightful decorative touch, adding a touch of whimsy to any kitchen.
Gather some mason jars with metal lids, a few screws, and a drill. Attach the lids to the underside of your counter with the screws, ensuring they are evenly spaced and securely fastened.
Once the lids are in place, fill your jars with spices or utensils, then screw the jars onto the attached lids.
Voila! You now have an efficient and charming storage solution that’s both easy to install and a pleasure to use.

19. Fire Pit Integration
Integrating a fire pit near your dining area can transform your outdoor space into a cozy gathering spot.
This setup encourages longer evenings spent outdoors, fostering connection and relaxation. To implement this idea, choose a safe, spacious location away from any flammable materials.
Ensure your fire pit is on a non-combustible surface like stone or concrete. Arrange seating around the fire pit to create an inviting circle.
Consider adding some cushions or blankets for extra comfort. Remember to keep safety tools like a fire extinguisher close by.
With a fire pit, your dining area becomes more than a place to eat; it becomes a place to make memories that will last long after the flames die down.

20. Tiki Torches
Tiki torches are a fantastic way to instantly boost the ambiance of your outdoor kitchen. They not only enhance the tropical vibe but also provide much-needed lighting for evening gatherings.
Hosting a barbecue or a casual get-together; the flickering flames of tiki torches can evoke a sense of warmth and excitement, transforming a simple night into a memorable event.
Pick a few high-quality tiki torches that match your style. Place them strategically around your outdoor kitchen area, focusing on spots where light is needed the most like near seating areas or pathways.
Ensure they’re securely anchored into the ground to avoid accidents. Fill the canisters with torch fuel, secure the wicks, and use a lighter to ignite.