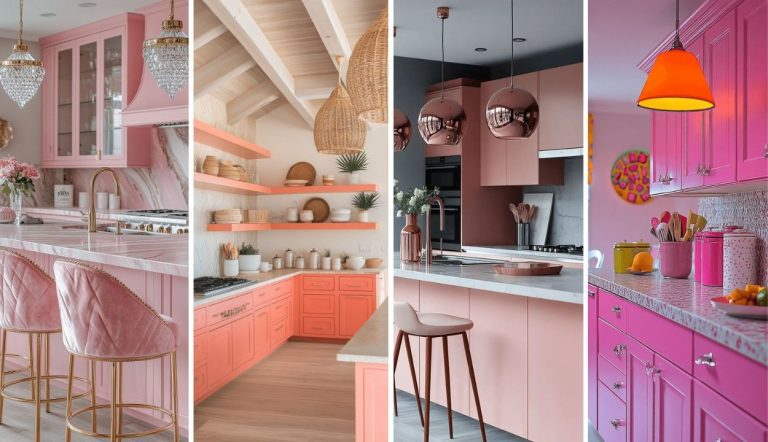
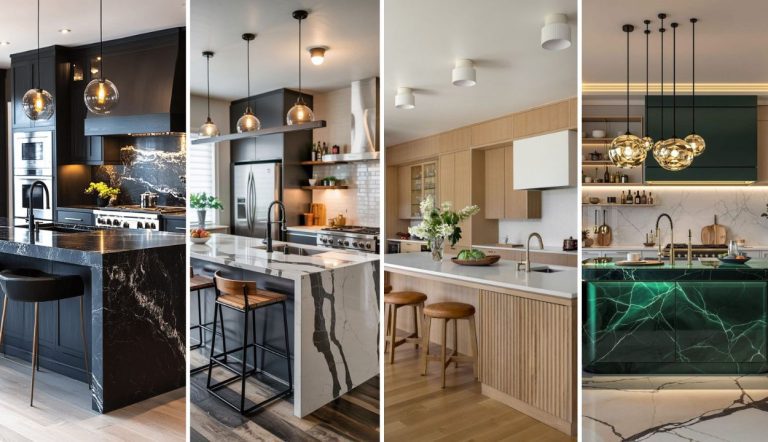
20 Unique Kitchen Backsplash Ideas You Must Try in 2024
Embarking on a kitchen renovation can be thrilling and overwhelming, especially when it comes to choosing the perfect backsplash.
The kitchen backsplash not only protects your walls from spills and splatters but also serves as a focal point that can transform the entire look of your space.
In this article, we will dive into a variety of kitchen backsplash ideas that cater to different styles and budgets, helping you find the perfect match for your kitchen.
What is the most timeless kitchen backsplash?
The most timeless kitchen backsplash is the classic white subway tile. Known for its clean and versatile look, white subway tile adapts to any design style, from modern to traditional.

Its durability and easy-to-clean surface make it a practical choice, while its elegant simplicity ensures it never goes out of style, providing a fresh and timeless backdrop for any kitchen.
1. Glass Tiles
Opting for glass tiles in varying shades of blue for your kitchen backsplash is a brilliant idea.
The reasoning behind this choice is that the glass tiles reflect light exceptionally well, making your kitchen brighter and giving it an open, airy feel.
The shades of blue mimic the shimmer of water, bringing a serene, aquatic vibe to your cooking space, which can be both calming and invigorating.
This backsplash is not just about aesthetics; it’s about creating an environment that feels fresh and inviting every time you step into your kitchen.
To implement this idea, choose glass tiles in multiple shades of blue to add depth and interest. Clean the wall surface thoroughly and ensure it is dry before starting.
Apply adhesive evenly, place each tile with care, and use spacers for uniform gaps. Once set, apply grout between the tiles and wipe off any excess.
The result is a stunning, reflective backsplash that enhances your kitchen’s beauty.

2. Penny Tiles
Copper or stainless steel penny tiles could be the wow factor your kitchen needs. Forget about traditional square tiles and imagine the charm of small, round tiles that reflect light beautifully.
These penny tiles add a touch of sophistication and a bit of shine, making your backsplash a focal point.
Their metallic look is not just trendy, it’s timeless, fitting well with various styles from modern to classic.
To achieve this start by measuring the area to make sure you buy enough tiles. Lay out the tiles on a flat surface to arrange the pattern.
Apply thin-set mortar evenly on the backsplash area and press the tile sheets into place. Once set, apply grout with a rubber float, spreading it into the spaces between the tiles.
Wipe off excess grout with a damp sponge and let it all cure. You’ll end up with a stunning, eye-catching backsplash.

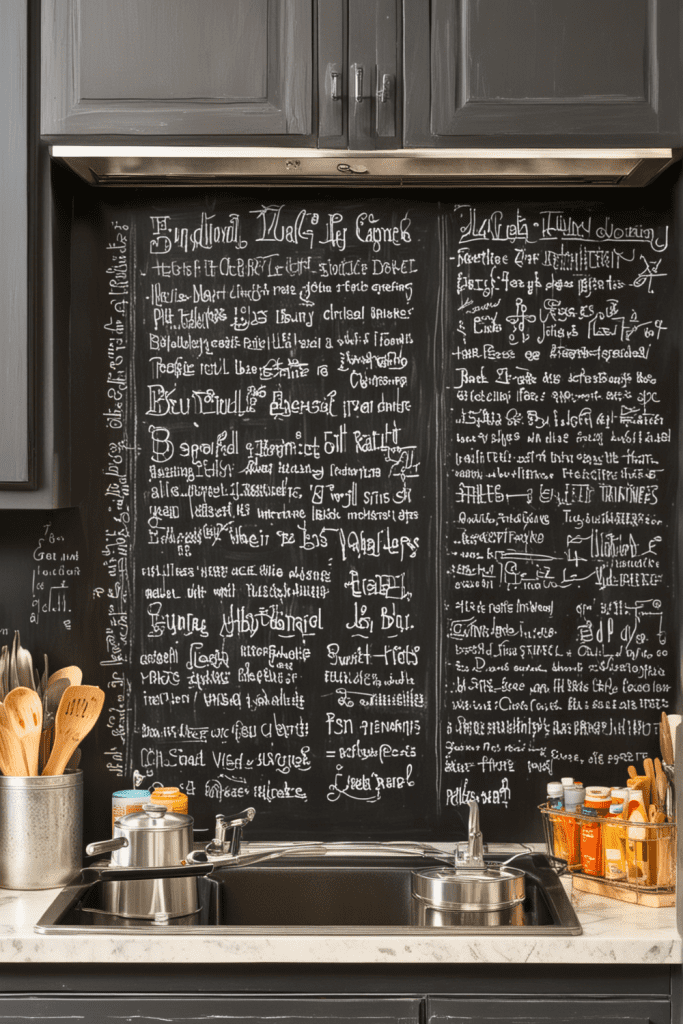
3. Chalkboard Paint
This creative idea transforms your backsplash into a functional space where you can jot down grocery lists, write daily menus, or let your kids express their artistic side with doodles while you cook.
It’s a practical addition that breathes life and interactivity into the heart of your home.
To get started, clean your backsplash thoroughly to ensure there’s no grease or debris. Apply a primer suited for your backsplash material and let it dry completely.
Then, paint over the primed area with chalkboard paint using a roller for an even finish.
Let the paint dry for at least 24 hours before conditioning it by rubbing a piece of chalk sideways over the entire surface, then wiping it clean.
Now, your kitchen has a new, fun feature that encourages creativity and communication.
4. Mirror Tiles
Mirror tiles can be a fantastic addition to any kitchen, especially if you’re looking to create a sense of space and brightness.
By reflecting light, these tiles have the magic ability to make tight or dimly-lit kitchens appear larger and more open.
This isn’t just a trick of the eye it’s a practical solution for enhancing natural light in spaces that could feel cramped or shadowy.
To install mirror tiles, start by selecting the wall that can benefit most from extra light reflection; typically, the backsplash behind the sink or stove works well.
Clean the area thoroughly, apply strong tile adhesive, and align the mirror tiles carefully to ensure they sit evenly.
Seal the edges with grout to prevent moisture from seeping in and to give a polished finish. The result is a kitchen that not only looks bigger but feels more inviting and modern.

5. Moroccan Tiles
Brighten up your kitchen with Moroccan tiles, an idea that brings a splash of exotic charm to any cooking space.
Known for their intricate patterns and vivid hues, these tiles are a go-to for anyone wanting to make a bold design statement.
The appeal lies in their ability to transform a plain area into something visually arresting and culturally rich.
They offer not just beauty but a sense of uniqueness, blending traditional craftsmanship with modern flair.
They can serve as focal points, whether as a backsplash, countertop, or even flooring, adding depth and character.
To integrate Moroccan tiles, start by selecting a color palette that complements your existing decor.
Plan the layout, focusing on high-impact areas like behind the stove or sink.
Ensure the surface is clean and even before applying adhesive and placing the tiles. Now grout the spaces in between, and seal them for durability.

6. Geometric Patterns
Choosing geometric patterns like chevron or diamond for your kitchen backsplash can instantly elevate the room’s aesthetic.
These designs introduce a modern vibe that effortlessly complements minimalist and contemporary styles.
The geometry adds a sense of depth and texture, making the kitchen feel more dynamic and interesting.
This type of backsplash can become the room’s focal point, drawing the eye and bringing coherence to the overall design.
They break the monotony of plain surfaces and inject energy into the space. The sharp lines and shapes add a creative touch that can make your kitchen stand out.
To implement this idea, start by selecting tiles that fit the desired pattern. Measure your backsplash area carefully.
Then, install the tiles according to the geometric design you have chosen, ensuring that they are aligned properly to achieve the intended visual effect. Seal the tiles to protect them and ensure durability.

7. Reclaimed Wood
Using reclaimed wood for your backsplash not only adds a rustic charm to your kitchen but also introduces an eco-friendly element.
Each piece tells a story, and the natural textures create a warm, inviting atmosphere.
Reclaimed wood backsplashes are making waves in the world of kitchen design because they blend style with sustainability.
This approach not only reduces waste by repurposing old materials but also saves you from the cookie-cutter look of conventional backsplashes.
The history etched in each piece of wood can bring a unique character to your space, making it feel personal and lived-in.
To do this, source your wood from salvage yards, old barns, or even wrecked ships. Ensure they are cleaned and treated for pests.
Then, measure your backsplash area and cut the wood to fit. Now, install the wood using a strong adhesive and seal it to protect against kitchen splashes. Simple, stylish, and sustainable.

8. Marble Slab
If you’re aiming to elevate your kitchen, consider a single marble slab for your backsplash. This idea isn’t just about adding style; it’s about making a bold statement.
The natural veining in marble gives your kitchen a touch of elegance that other materials simply can’t match. A seamless marble finish creates a unified, clean look.
Beyond the aesthetics, marble is durable and easy to clean, ideal for a space that’s used daily.
To achieve this, choose a marble slab that complements your kitchen’s color scheme and ensures the wall is even and smooth.
You’ll need a professional to cut and place the marble precisely, securing it with high-quality adhesive.
Seal the marble to protect it from stains and moisture. It’s an investment, but the payoff is a high-end, sophisticated kitchen that stands out.

9. Antique Mirror
Transform your kitchen into a stylish haven with an antique mirror finish. This idea not only highlights your taste for vintage glamour but also adds a spacious feel to your cooking area.
Ideal for both modern and classic setups, an aged mirror look brings a unique charm that ordinary mirrors just can’t match.
The reflective surface can make even the smallest kitchen look bigger and brighter, without being overpowering.
Start by selecting a mirror with an antique finish, available in many home decor stores.
The process involves distressing the mirror’s surface to create an aged appearance, often done by hand or using specialized chemical solutions.
Once you have your mirror, position it strategically in your kitchen above countertops or as the backsplash to maximize its visual impact.

10. Herringbone Pattern
If you’re looking to add a sophisticated touch to your kitchen, consider the herringbone pattern, a design that never goes out of style.
This timeless layout adds an element of intricacy that can turn a bland space into a visual delight.
The herringbone pattern not only enhances the aesthetic appeal but also creates a sense of luxury and craftsmanship. It’s a design that catches the eye and elevates the entire room.
To achieve this look, start by selecting long, rectangular tiles. Begin laying the first tile at a 45-degree angle at the center of the space you’re decorating.
Then, lay the second tile perpendicularly against the end of the first one, creating an ‘L’ shape. Continue this pattern, ensuring each tile interlocks perfectly.
A striking, dynamic pattern that captures light and adds depth to your kitchen. It’s a perfect blend of classic beauty and modern elegance.

11. Mosaic Art
Adding a personal touch to your kitchen that not only captivates but also speaks volumes about your style.
That’s the magic of a mosaic art backsplash made from broken tiles or glass. It’s an idea that marries creativity with practicality, making your kitchen a centerpiece of artistic expression.
Why choose this idea? It’s simple. Mosaic art is timeless and uniquely yours. Each piece tells a story, reflecting your personality and taste. It’s a fantastic way to recycle materials that would otherwise go to waste.
To create your mosaic backsplash, start by collecting broken tiles or glass pieces. Then, plan your design on a sheet of paper.
Clean the surface thoroughly where the mosaic will go, ensuring it’s dry and smooth. Apply a layer of adhesive, and place your tiles or glass pieces according to your design.
Once set, fill the gaps with grout, and let it dry. Finally, wipe the surface clean to reveal your masterpiece.

12. Terrazzo
Looking to add some personality to your kitchen? Consider jumping on the terrazzo trend for your backsplash.
Terrazzo, known for its impressive durability and vibrant array of colors, can turn a mundane kitchen into a visual delight.
This material incorporates chips of marble, quartz, granite, and other substances, set in cement or resin, to create a striking mosaic effect.
It’s not just eye-catching; terrazzo is also hard-wearing and easy to maintain, making it a practical choice for busy homes.
To incorporate terrazzo into your kitchen, start by selecting a color palette that complements your existing decor.
Terrazzo comes in countless color combinations, so you’ll have plenty of options. Once you’ve made your selection, consult with a professional installer to ensure the tiles are applied correctly.
This will not only enhance the aesthetic appeal of your kitchen but also add a layer of durability that will withstand the test of time.

13. Stainless Steel
Stainless steel backsplashes are a perfect blend of practicality and style. Well, stainless steel offers a contemporary, industrial aesthetic that can instantly elevate the look of your kitchen.
It’s slick, and shiny and matches seamlessly with appliances and fixtures. More importantly, it’s super easy to clean.
Spills, splashes, and stains don’t stand a chance against its smooth surface, which can be wiped down in seconds.
To install a stainless steel backsplash, you first need to measure the area to ensure a precise fit. Then, using a strong adhesive, you can mount the stainless steel sheets directly onto the wall.
It’s an easy process, and with a little patience, your kitchen will have a new, trendy look that’s both durable and easy to manage.

14. Peel and Stick Wallpaper
Peel-and-stick wallpaper is a game-changer for anyone wanting a fast, stylish home update.
This trendy option is perfect if you’re tired of your current décor but aren’t ready for a permanent change.
It offers incredible versatility. With a vast array of patterns and colors, you can effortlessly switch from bold designs to subtle textures, matching any mood or season.
It’s user-friendly, requiring no special tools or professional help, making it ideal for renters or those who love frequent makeovers.
To achieve this start by cleaning your wall, measuring and cutting the wallpaper, peeling off the backing, and sticking it directly on the wall.
If you make a mistake, it’s easily removable and repositionable. In no time, you can transform your space, giving it a fresh, personalized look without the fuss and permanence of traditional wallpaper.

15. Laser-cut Wood
Transforming your kitchen with laser-cut wood panels can add a touch of elegance and personality.
This idea is simple yet compelling: use laser technology to create intricate designs on wood panels that can serve as a unique focal point in your kitchen.
Its wood adds warmth and a natural feel to any room, while the precise laser cuts bring in a sophisticated, contemporary touch.
It’s a blend of tradition and modernity that can make your kitchen not just a functional space, but also an artistic one.
The method involves using a laser cutter to carve out detailed patterns on wood panels.
This precise technique ensures clean lines and intricate details that are hard to achieve with traditional tools.
Installing these panels is relatively easy, often involving simple mounting techniques, making it an accessible option for a kitchen makeover.

16. Pressed Tin
Pressed tin panels can truly transform your kitchen, offering a vintage or country-style look that is both charming and unique.
These panels add character with their intricate embossed designs, instantly providing texture and an old-world charm that can elevate any kitchen decor.
They work well with a range of styles, blending seamlessly into both traditional and modern spaces.
To integrate pressed tin panels into your kitchen, start by choosing a design that compliments your overall theme.
Whether you’re looking for something ornate or more geometric, there’s a variety of patterns available.
Measure the area where you plan to install the panels, whether it’s a backsplash or an entire wall.
Use tin snips to cut the panels to fit and adhere them directly to the wall using a strong adhesive. Finish off with a protective coat to ensure longevity and durability.

17. Subway Tile with Dark Grout
Subway tiles with dark grout are making waves in kitchen design for their striking visual appeal.
This combination isn’t just about aesthetics; it’s about creating a bold, graphic statement that stands out.
The dark grout contrasts sharply with the clean, white lines of the subway tiles, providing a modern yet timeless look that draws the eye.
It’s a clever way to add depth and interest to your kitchen without overwhelming the space.
To achieve this look, start by selecting classic white subway tiles and choose a dark grout color, such as charcoal or black.
When applying the grout, make sure to carefully follow the lines of the tiles to ensure a sharp, clean finish.
This contrast will not only emphasize the geometry of the tiles but also make maintenance easier, as dark grout is less likely to show stains over time.

18. Beadboard
Beadboard as a backsplash brings a welcoming, cottage-style charm to any kitchen. It’s a simple and affordable way to transform the overall ambiance of your cooking space.
The best part is, it’s an easy project that you can tackle over a weekend, even if you’re not a DIY expert.
To install the beadboard, start by measuring the area where you want it to go. Purchase enough panels to cover the space, along with adhesive and finishing nails.
Cut the beadboard to fit, apply the adhesive to the back, and press it onto the wall. Secure each panel with finishing nails.
Once it’s up, paint it to match or contrast your existing decor. And there you have it a kitchen makeover that’s as charming as it is budget-friendly.

19. Hexagon Tiles
Hexagon tiles bring a unique, modern touch with their distinct shape. Arranging them in your backsplash can create a stunning visual appeal that breaks away from traditional tile shapes.
The idea of using hexagon tiles is all about adding a contemporary twist to your kitchen or bathroom.
These six-sided wonders offer versatility and eye-catching patterns that easily elevate any space. They work well in both small and large areas, making the room feel more dynamic and sophisticated.
To achieve this look, start by choosing a color scheme that complements your existing décor. Bold colors can make the tiles pop, while neutral tones provide a subtle elegance.
Plan the layout carefully, ensuring the tiles fit together seamlessly. Use tile spacers to maintain even gaps, and apply grout to secure them in place.

20. LED-Lit Backsplash
Transforming your kitchen into a modern, dynamic space with the simple addition of an LED-lit backsplash.
This vibrant feature not only brings a futuristic flair but also serves a functional purpose. You can set the lighting to soft, warm hues for a relaxing evening or bright, invigorating colors for an energetic morning start.
It’s all about enhancing your cooking environment. The adjustable lights can elevate your mood, making meal preparation an enjoyable experience. It also provides extra illumination where you need it most.
As for the method, start by selecting LED strips designed for kitchen use. Decide on a color scheme that complements your overall decor.
Install the strips behind clear or frosted panels for a sleek look. Connect the lights to a smart controller, giving you the power to change colors effortlessly via an app or remote.