How to Edge a Flower Bed?
A Complete Human-Friendly Guide for a Clean, Beautiful Garden
A garden always tells a story. Sometimes it feels wild and free, other times structured and intentional. But if there’s one small detail that instantly changes how polished your garden looks, it’s this: clean edging around flower beds.
You could have the most beautiful roses, tulips, or seasonal blooms but if the edges are messy, the whole space feels unfinished. On the other hand, a sharply defined flower bed can make even a simple garden look like something out of a landscaping magazine.
This guide walks you through everything no complicated jargon, no robotic instructions just real, practical steps on how to edge a flower bed like someone who actually enjoys their garden.
Why Edging a Flower Bed Matters More Than You Think?
Before jumping into tools and techniques, it helps to understand why edging is such a big deal. When grass and flower beds blend together, the garden loses structure. Weeds creep in faster. Lawn mowing becomes messy. And visually, everything feels a bit “blurred.” Edging solves all of that.
A clean edge:
- Separates grass from plants clearly
- Prevents lawn from invading your flower beds
- Reduces weed spread
- Makes mowing easier and faster
- Gives your garden a professionally landscaped look
Think of edging as the “frame” around a painting. Without it, even beautiful work feels incomplete.
Tools You Can Use for Edging a Flower Bed:
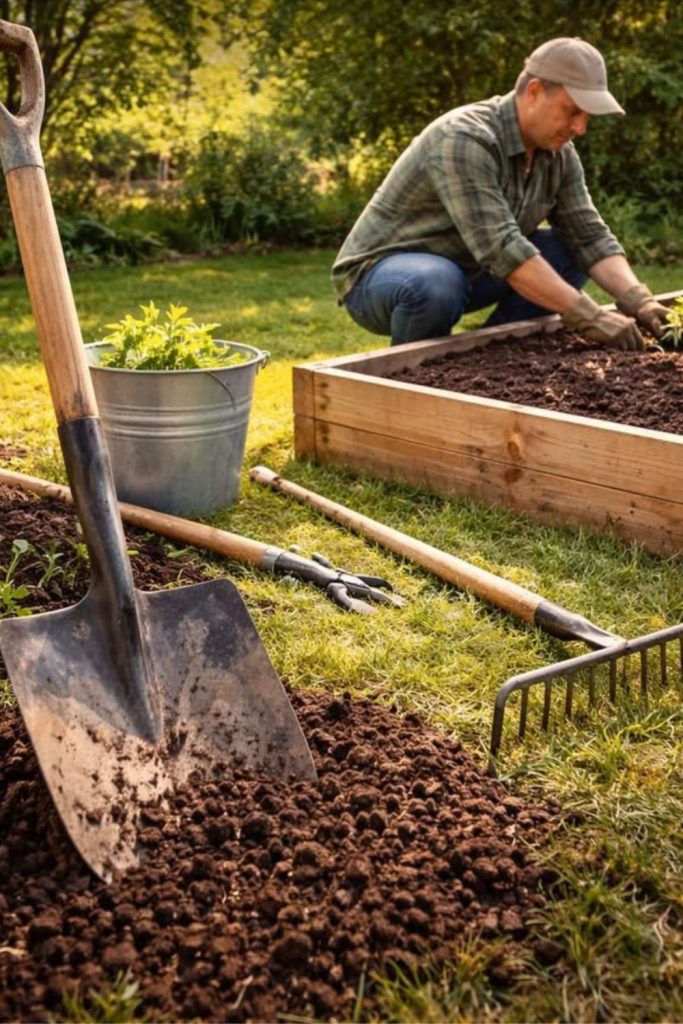
You don’t need expensive landscaping equipment. Most edging jobs can be done with basic tools you might already have.
Here are the common ones:
1. Manual Half-Moon Edger
A curved blade attached to a handle. This is one of the most traditional and effective tools for clean cuts.
2. Spade or Shovel
If you don’t have a dedicated edger, a sharp spade works surprisingly well.
3. String Trimmer (Weed Eater)
Good for maintaining edges, but not ideal for creating deep, defined borders.
4. Garden Hose or Rope
Used for marking curved or wavy edges before cutting.
5. Rake and Gloves
For cleanup after cutting.
You don’t need everything. Even a shovel and patience can get you professional-looking results.
Step-by-Step: How to Edge a Flower Bed Like a Pro:
Let’s go step by step in a way that actually makes sense in real gardening conditions.
Step 1: Plan the Shape of Your Flower Bed
Before cutting anything, stand back and look at your garden. Ask yourself:
- Do I want straight, formal lines?
- Or soft, natural curves?
- Does this shape match the house and lawn?
Straight edges feel modern and structured. Curved edges feel more natural and relaxed. Use a garden hose or rope to lay out the shape. Move it around until it “feels right.” This step is underrated, but it decides the entire final look.
Step 2: Mark the Edge Clearly
Once you’re happy with the shape, press it lightly into the soil using your foot or a shovel tip. You don’t want guesswork here. A visible line makes cutting easier and more accurate.If you skip this step, your edge can easily become uneven and that’s where most beginners struggle.
Step 3: Start Cutting the Edge
Now comes the actual edging. Take your spade or half-moon edger and insert it into the soil at a slight angle (about 45 degrees). Push down firmly. Cut along your marked line, removing a thin strip of grass and soil.
Keep these tips in mind:
- Don’t rush. Clean cuts matter more than speed
- Keep your tool sharp
- Follow the line slowly and steadily
- Step back occasionally to check alignment
If the soil is hard, water it lightly a few hours before edging. Softer soil makes the process much easier.
Step 4: Remove Excess Soil and Grass
After cutting, you’ll have loose turf and soil along the edge. Use your shovel or hands (with gloves) to remove it completely. This creates that sharp separation between lawn and bed. This is where the transformation really starts to show.
Step 5: Refine the Shape
Now go back and fix any uneven areas. Some sections might be too shallow or too deep. Smooth them out slowly. Think of this stage like shaping clay you’re refining, not rebuilding.
Step 6: Clean the Edge
Once satisfied with the shape:
- Rake away debris
- Level loose soil inside the flower bed
- Sweep grass clippings off the lawn
A clean edge should look intentional, not messy or freshly dug.
Step 7: Optional Finishing Touch (Mulch or Border)
If you want a more polished appearance, consider adding:
- Mulch (wood chips, bark, or compost)
- Decorative stones
- Plastic or metal edging strips
These materials help maintain the shape longer and reduce maintenance.
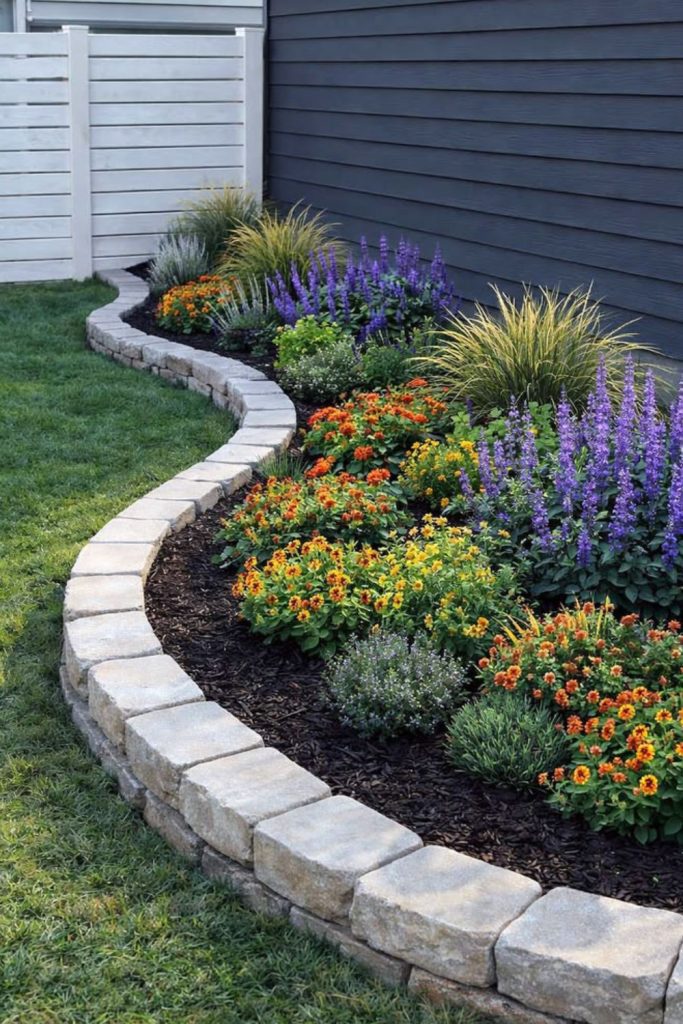
Different Styles of Flower Bed Edging:
Not all gardens are the same. Here are a few styles you can try depending on your space.
1. Classic Straight Edge
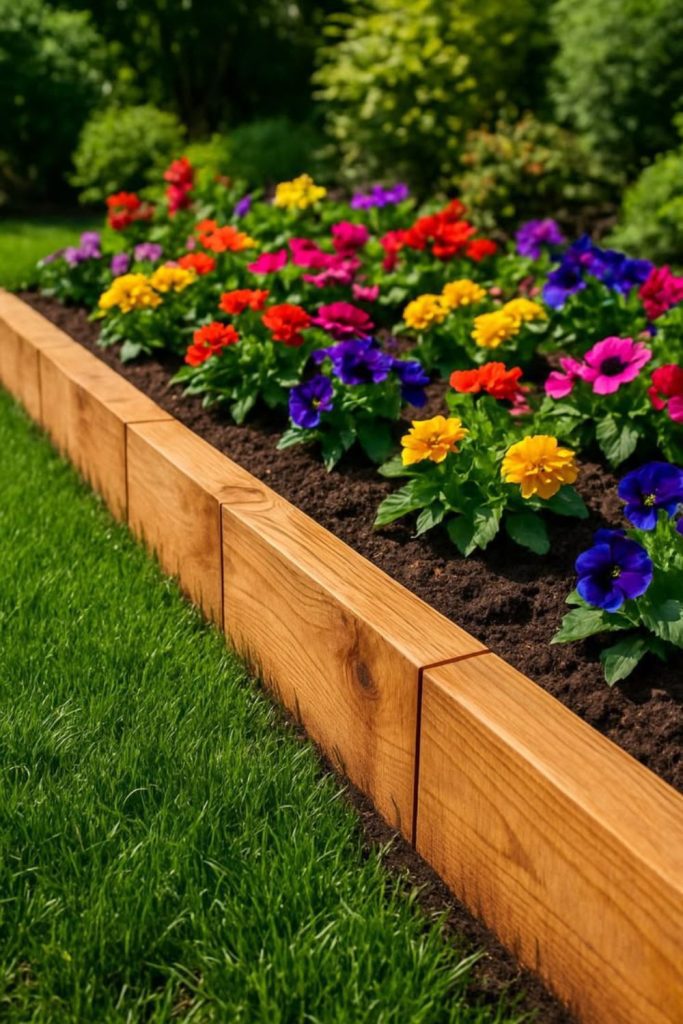
Clean, minimal, and perfect for modern homes. Works best in geometric gardens.
2. Natural Curved Edge
Soft waves along the lawn. Feels organic and relaxed, like nature shaped it itself.
3. Deep Trench Edge
A deeper cut that creates a shadow line. Looks bold and reduces grass creep.
4. Mulch-Filled Edge
Simple trench filled with mulch for a natural but tidy appearance.
5. Stone Border Edge
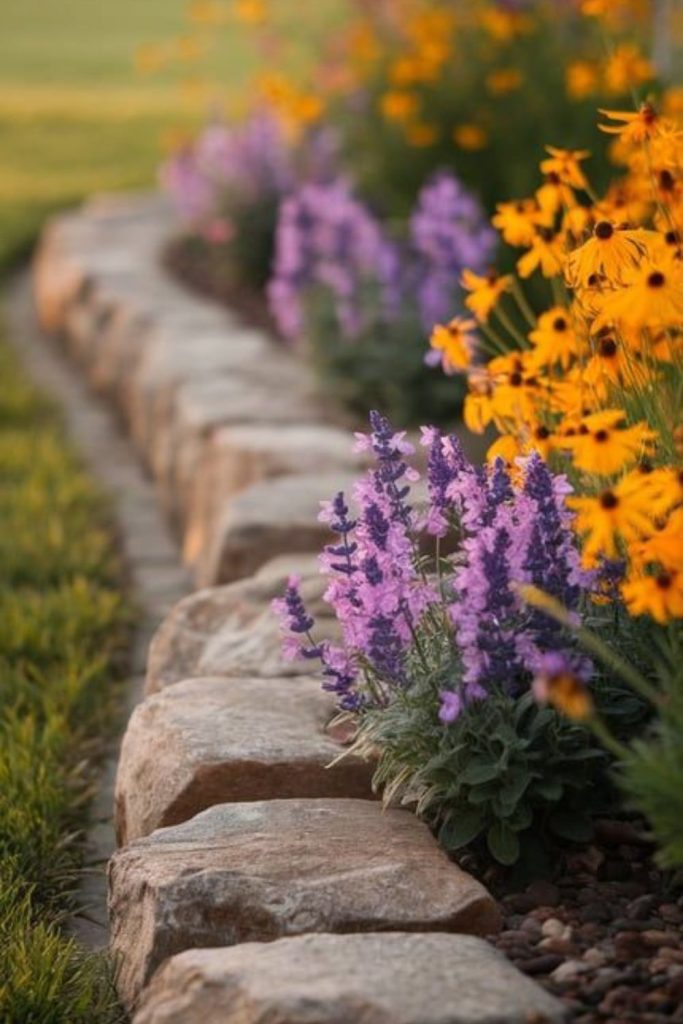
Permanent and decorative. Ideal if you want a long-lasting structure.
Common Mistakes to Avoid:
Even simple edging can go wrong if you’re not careful. Here are the usual mistakes people make:
1. Uneven Cutting
Rushing leads to wobbly lines. Slow down.
2. Ignoring Maintenance
Edges don’t stay sharp forever. They need regular touch-ups.
3. Wrong Tools
Using blunt tools makes everything harder and messier.
4. Overcomplicating Shapes
Too many curves or angles can make the garden look chaotic.
5. Skipping Cleanup
Leaving debris ruins the clean effect you just created.
How to Maintain Flower Bed Edges?
Edging is not a one-time job. It’s more like grooming small maintenance keeps it sharp.
Here’s a simple routine:
- Light trim every 2–3 weeks during growing season
- Re-cut edges every 1–2 months if needed
- Keep grass from spreading into beds early
- Add mulch once or twice a year
If you stay consistent, you’ll rarely need a full re-edging.
Pro Tips for a Professional-Looking Edge:
Here are some small insights that make a big difference:
- Edge after rain or watering for easier cutting
- Use a string line for perfectly straight borders
- Stand above the edge while checking alignment
- Combine edging with mulching for best visual impact
- Always step back and view from different angles
The goal isn’t just “cutting grass away” it’s shaping space.
Final Thoughts:
Learning how to edge a flower bed isn’t complicated, but it does require patience and attention to detail. Once you do it a few times, it becomes almost meditative cut, shape, refine, step back, admire.
A garden doesn’t need perfection. It just needs care and definition. And edging is the quiet detail that brings everything together. So next time your lawn starts creeping into your flower beds or things begin to look a little messy, don’t overthink it. Grab a simple tool, draw a line, and start shaping your space. A clean edge changes everything.